Greenhouse & Potting Shed Construction
Greenhouse & Potting Shed Construction
 |
The greenhouse & potting shed features include:
|
 |
Construction began with site preparation. The one foot excavation of sod and top soil was step one. The 4" X 4" treated lumber perimeter foundation was cut to length and placed into position.
|


 |
| Two 30"ground anchor screws were bolted under each of the four sides of the foundation walls, leveled and cemented into the ground. |
 |
| Foundation beams were bolted together on the corners for added strength. |
 |
Rafters were constructed utilizing 1/2" plywood gussets & 2"x 4"spruce lumber. The gussets gave the greenhouse structural strength and an open concept interior design.
|
 |
The rafter layout design jig was drawn onto the concrete garage floor. Rafter roof and wall components were cut to size and placed on the floor markings. The pattern jig on the floor provided a uniform and exact rafter pattern design. The plywood gussets were placed on the rafter components; glued and nailed.
|
 |
| A 2" x 4" plate was nailed on top of the foundation beams. Rafters were placed @ 16" centers and screwed in place on the foundation plate. The exposed wall rafters were pre painted prior to placement on the greenhouse side of the structure. |
  |
Plywood wall & roof sheets are nailed on the potting shed side of the project.
Window holes are cut in.
|
 |
| Roof dormer was constructed to accommodate the 6' 8" door opening. |
 |
| Door opening was cut and the building paper was stapled in place. The 6" spruce fascia trim boards were added. |
 |
| Door header construction was done using a router. Constructed using two 2" x 10" planks.Router jig was used to allow for an eight inch curve in the top of the door. Two planks were cut, glued together & screwed in place in the door rough opening. |
 |
| Completed door header component |
 |
| Door was cut using the same router jig to match the top shape of the door to the header. |
 |
The outer door was laminated using 2 1/2" x 5/16" thin cedar strips. Door hinge hardware are mounted in place. We decided to make a Dutch door. Door edge was cut on a 15 degree angle to allow any precipitation to run off the face of the door.
|
 |
| Rough cut 1" x 6" spruce lumber was used for external siding. |
 |
| Windows are installed. |
 |
| Cedar shakes are added above the door |


 |
| Polycarbonate sheeting installed |
 |
| Shingles installed |
 |
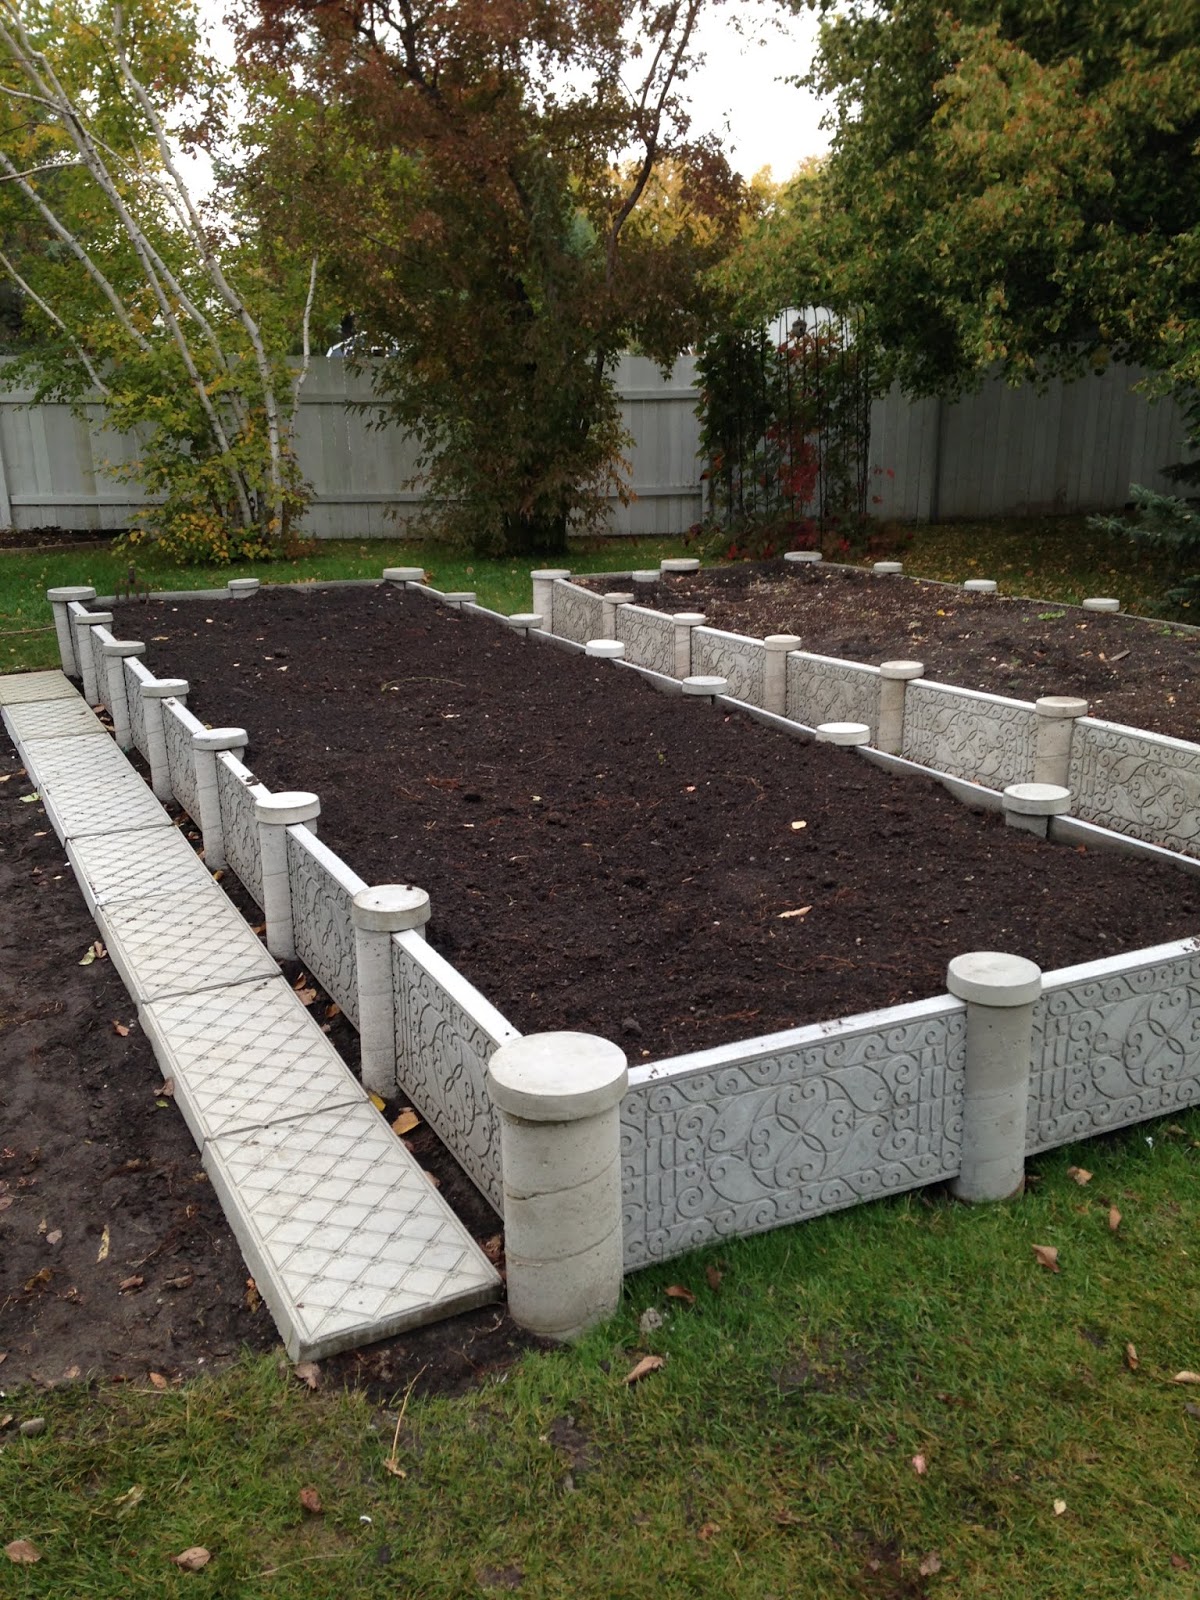
| 10" layer of pea gravel & 1 1/2" rock added to the floor |
 |
| Patio blocks installed on top of the pea gravel and rock. The idea was to create a heat sink. The one foot depth of aggregate and blocks would retain heat during the day. The stored heat in the floor would dissipate in the cooler evenings into the greenhouse. |


 |
| Potting shed was insulated with R 12, poly vapor barrier & lined with 2 1/2 " x 5/16 "cedar strips. Electrical wiring including plugs, lights, heater & 8" ventilation fan with thermostatic controls were added. Door latches were installed. |
 |
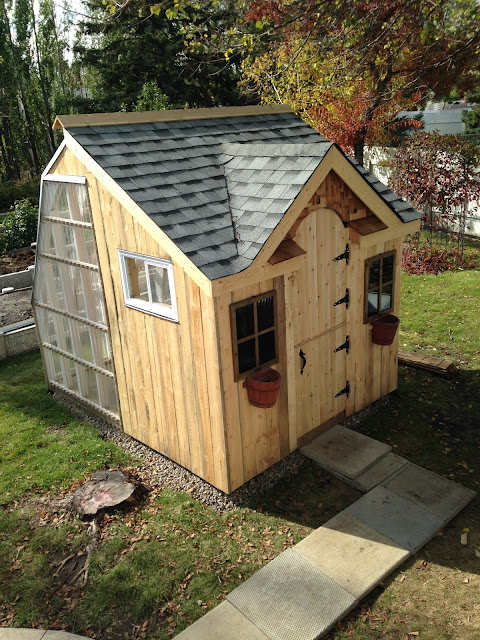
| Window flower pots installed. Walkway installed. |
 |
| Wire racking and potting bench added. |

 |
| 2019 Vikingardeners |

Comments
Post a Comment